How to Install Let’s Encrypt SSL in cPanel

In this tutorial, you will learn how to install Let’s Encrypt SSL for one of your domains in a few clicks.

What is Let’s Encrypt?

Let’s Encrypt is a free, automated, and open certificate authority brought to you by the non-profit Internet Security Research Group (ISRG).

Let’s Encrypt SSL Install Requirements

There are a few requirements that your domain should meet so you can install a Let’s Encrypt SSL successfully on it:

  1. The domain and its www subdomain should be pointed to your cPanel account’s IP address. Otherwise, the certificate cannot be verified and installed on your domain.

    2. By default, when you initiate the installation of a Let’s Encrypt SSL on your primary domain, cPanel will include your parked domains as part of the SSL installation. If you have a parked domain that is not pointed to your cPanel’s IP address, the SSL installation will fail. You should either point these domains to your cPanel account or temporarily unpark them until the installation completes.


How to install Let’s Encrypt SSL on your domain

This tutorial assumes you’ve already logged in to cpanel.

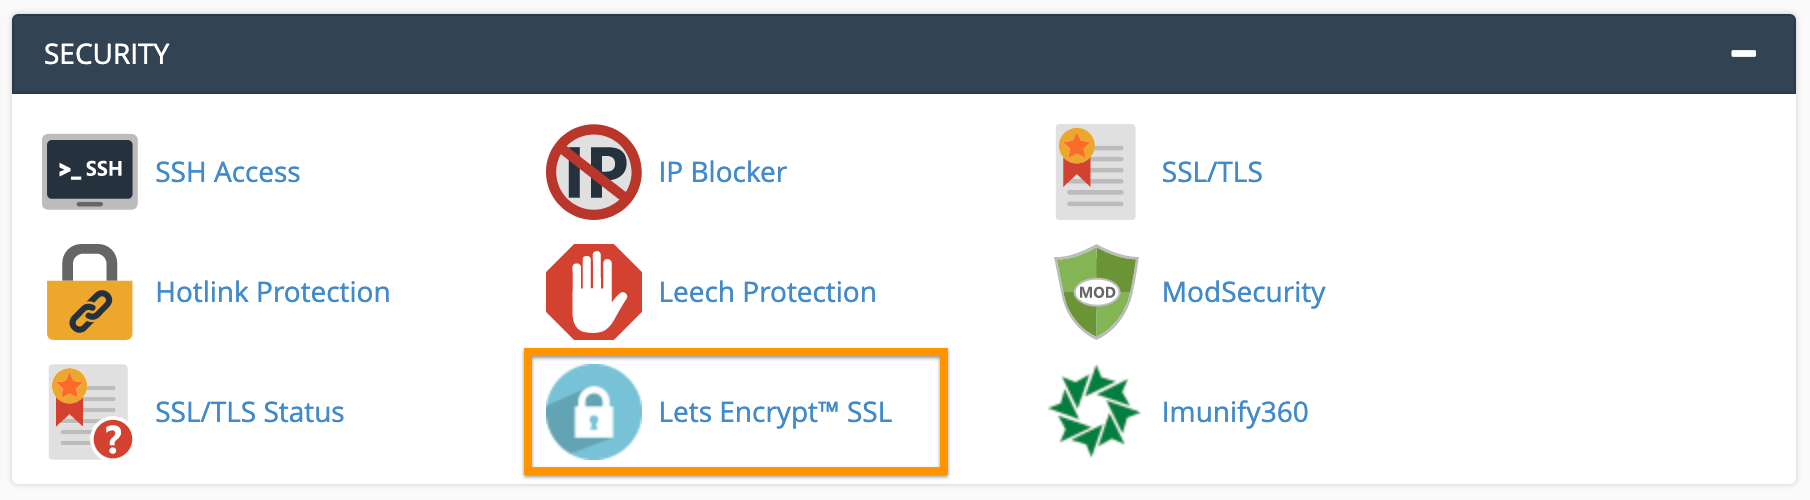
1) Once you are logged in to cPanel, scroll down the page to the ‘SECURITY’ area. Then click on Let’s Encrypt SSL. 

Security - Let's Encrypt
cPanel > Security > Let’s Encrypt

2) The next step is to issue a new SSL certificate for the desired domain name. Choose from one of your domains in the list then click ‘Issue‘ under Actions.

Issue a new SSL Certificate > Issue

3) In the next window, you will have multiple Domain options. For better understanding, we’ll explain each one.


Include Wildcard? – select this option only if you want to install a Let’s Encrypt Wildcard SSL, which will cover *.yourdomain.com. To include wildcard domains, please make sure to choose first the dns-01 validation method.

Add cPanel subdomains? –  to select some additional cPanel subdomains*. This is optional and it’s not a mandatory checkbox.


cPanel subdomains are cpanel.* and webmail.*, which, when added, allows access to cPanel services via that subdomain.

4) Choose an SSL validation method:


http-01 – You will usually want to use the HTTP validation method.

dns-01 – If your domain’s nameservers point to cPanel, then you have the option of using the DNS validation method instead.


If you wish to issue wildcards, you MUST use the DNS validation method.

5) Once you’ve chosen the validation method, click on the ‘Issue‘ button.

That’s it! The SSL certificate will be installed on your domain. The virtual host will be automatically updated with the new certificate, and Apache will be restarted in the background.

  • Free SSL, Lets encrypt, ssl
  • 0 Users Found This Useful
Was this answer helpful?

Related Articles

Clearing cookies/Cache on your Browser

Clearing cookies/Cache on your BrowserHello Clients,This article will help you to Mass Refresh...

Custom PHP Limits using .user.ini

To add custom php limits like memory limit,Upload limit You can do it from .user.ini file Create...

Enable Gzip To Speedup the Loading time

Hello Mod_deflate is an apache module that can be used to compress data using gzip compression...

Force Password Reset cPanel/WHM

Force Password in cPanel Servers are for security purposes for a certain number of days the...

How to fix CPU Overload/Abuse Issues ?

Hello,This article will help you with fixing CPU Overload/Abuse issues for your cPanel accounts....